
In the process of working with clay or in crafts with clay, we can find a material called slip, which has several uses, but the main one is to glue and repair clay objects.
The slip has been used for a long time, beginning simply as a mixture of clay and water and now some elements have been included in the mixture, such as electrolytes to make the mixture more resistant, especially in the ceramics industry.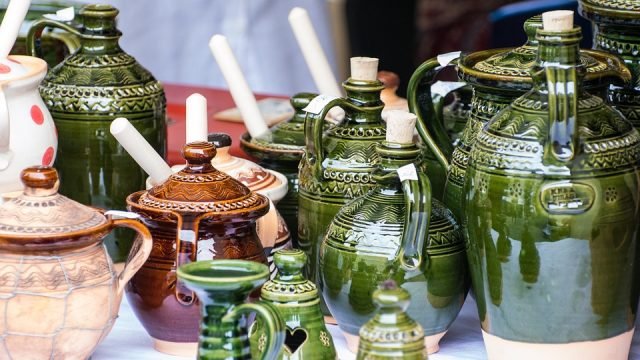
If you are working with clay or would like to get started in this world and start making your clay crafts, then this article from doncomos.com on how to make slips will help you a lot in the process.
What is the slip
- The slip has traditionally been a mixture of clay and mud, forming a slightly thick and thin liquid that maintains a certain viscosity necessary to carry out its functions, but the final density will be given by the function for which we need the slip, and it can be thinner or thicker.
- The slip must always be sifted, as it must be a uniform mixture without lumps that could harm the piece.
- On the other hand, the mixture formed by water and mud is also called slip at the bottom of the container where the potter (the one who makes the figures in mud) wets his hands many times during the elaboration of his object to reduce the friction that is produced during turning. This slip or “barrio” receives various names in different parts of Spain. For example, in Almería it is called moxa, and in the Spanish Levante “alimoja”.
What is the slip made of?
As we have mentioned, the slip is mainly composed of some type of clay and water, but this composition has been improved, especially to make it more resistant or to make the clay paste last longer over time. To achieve these improvements, quartz, sodium carbonate, sodium silicate, and calcium carbonate are added to the basic slip.
Slip uses
We can use the slip in three different ways:
- Casting technique. The casting technique is one by which clay molds are filled repeatedly to achieve certain shapes (especially used in mass reproduction). Once the slip is dry we can remove the mold and have the piece ready to paint or to show off. To carry out this technique, it is usually important to add some additives, such as sodium silicate, this allows us to control and regulate the fluidity of the slip.
- Grout. In this case, we use the slip as if it were glue, which is useful for joining pieces of clay pieces, whether they are pieces that have become detached, or broken, or to join handles, spouts, etc.
- It is generally more difficult to join pieces if the clay is already dry, so it is best to do these joints while the clay is still slightly wet. But if you are joining pieces of dry clay you should cover the joint both inside and out with slip, you will press both parts until they have gained some strength and have dried enough for them to separate again. Then you must clean and smooth the joint area and let it dry completely before putting it to cook.
- Decoration with slip. We can use the clay slip to make certain decorations on clay objects. It is more common to use white clay to which oxides and other colorants have been added until the desired color is achieved. This slip should be applied to the object when it has the clay in a leather state. The process to apply this decoration can be done in many different ways, for example, dipping, trailing, banding, brushing, wax reserves, feathering, sgraffito, etc.
- Also, colors can overlap. Normally once the piece is dry it is fired, and a clear glaze is added and fired again.
- For this technique we can do it in various ways, but in general we can apply a background slip, dry it, and bake it and then add slips of different colors to make drawings and other decorations.
How to make a slip
- You can buy clay in specialized stores, it is not a very expensive material, so it may be the best option if you want to save time and work. You can also make slip at home if you undo dry mud, or turn the piece of dry mud into dust, either by crushing or crushing it, for example. Then we will add water and stir until the mixture is uniform and without lumps. In general, the dough should not be too dry or too liquid, its general appearance should resemble that of yogurt.
- You should never exceed the amount of water, since the thicker we make the slip mixture, the sooner it will take effect. In general, the added water should never exceed 45% of the weight of all the solid materials in the mix (clay, quartz, sodium silicate, etc.).
- You should also know that there are many types of clays, but you should always make your slip mix with the same kind of clay that your sculpture is made of.
- Once you have the mixture ready, you should apply it in good quantities with the help of a modeling stick, a brush or another utensil that allows you to press one piece of clay against another and the slip protrudes on all sides.
- If what you are going to do is use the slip as glue, the first thing you should do is scratch the edges of the pieces, this will make the slip that we will apply later hold much better and have more strength when joining both pieces.
- If you are going to use it in the casting of pieces, do not forget to add the necessary components to avoid vaguely, that is, to make a more fluid mass and allow better dispersion of the clay particles, thus achieving an emulsion that this mixture lasts longer. This is known as deflocculating, (or allowing the fluidity of the clay mixture), and for this, it is necessary to add some type of electrolyte or mixture of electrolytes, such as soluble sodium silicate, (which is the most used, because it is easier to get and cheaper), tannic acid or sodium carbonate.
- Once you finish with the work you have in your hands, you can save the slip that you have left over to use on other nearby occasions, so if you use this clay frequently you don’t need to be as careful as if you don’t use it as often. often. Just store it by covering it with kitchen wrap. If when you are going to use it it is too dry, you can always add a little water and stir again to revive your slip and work with it again.
- In this article on how to make a slip, we have explained everything you need to know about it, so you can improve your pottery skills and take your figures and pieces further by adding details or even adding parts as simple as handles, lids, and you can even add decorative details.